5 Best Ways to Program Smart LED Lighting Controllers?

Time:2026-10-09 Author:Liam
0%

Smart LED lighting controllers can reduce energy use, improve visibility, and simplify maintenance when programmed carefully. Yet a reliable result depends on more than selecting an app or connecting a sensor. Installers must understand voltage limits, communication protocols, dimming curves, time schedules, and local lighting requirements. A controller may look simple on a workbench. Streets are less forgiving.

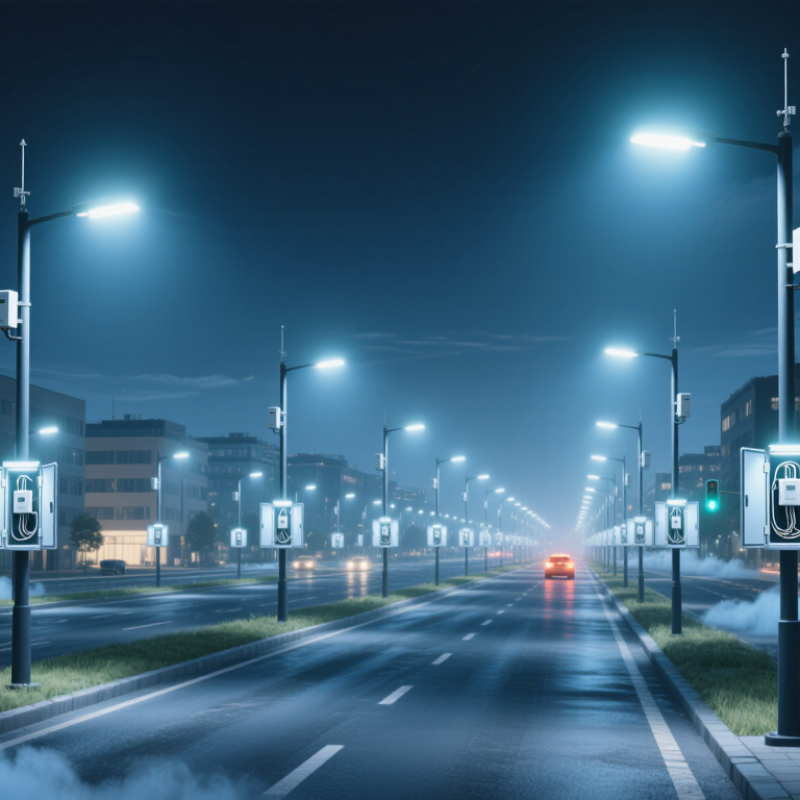
This guide explores five practical ways to program smart LED lighting controllers, from timed dimming to adaptive sensor control. It also considers wireless networks, astronomical clocks, fault alerts, and remote monitoring. How to program a smart LED street lighting controller? Begin with the actual site conditions, not a copied template. Check pole spacing, traffic patterns, ambient light, weather exposure, and emergency override needs. Small details matter.

Use conservative settings during early testing. Record power readings before and after each change. Observe the road at dusk, midnight, and dawn. The brightest setting is not always the safest or most efficient. That assumption deserves review. Experienced technicians also test communication loss, sensor errors, and manual control recovery before full deployment. Keep firmware updated through approved channels. Protect access credentials. Document every setting.

Some projects will not perform perfectly on the first attempt. Sensors can misread fog, trees, or vehicle headlights. Wireless signals may weaken near dense structures. A thoughtful programming process leaves room for adjustment, verification, and honest maintenance records. That is how smart lighting becomes dependable infrastructure rather than an impressive dashboard.
5 Best Ways to Program Smart LED Lighting Controllers?

Define the Smart LED Controller’s Hardware, Inputs, and Communication Protocols

5 Best Ways to Program Smart LED Lighting Controllers?

Before writing control logic, define the controller’s hardware limits. Record input voltage, output current, channel count, and heat tolerance. Use a multimeter during a bench test. Check the enclosure after thirty minutes at full brightness. Start with measurements. A controller may support four channels, yet its power supply may not. Add ventilation where needed, and leave space for terminal access. Keep it serviceable.

Document every input before assigning behavior. Inputs may include occupancy sensors, ambient-light sensors, push buttons, or analog dimming signals. Note their voltage ranges and normal reading values. Configure debounce timing for mechanical switches, usually between 30 and 80 milliseconds. Calibrate light sensors beside a window and under artificial light. That assumption failed in my first test. Bright afternoon light caused unexpected dimming.

Choose communication protocols that match the installation. A wired lighting bus suits fixed rooms, while wireless communication can simplify retrofits. For networked systems, define message formats, device addresses, timeout rules, and recovery behavior. Test what happens when communication stops. Lights should enter a safe state instead of remaining fully powered. Keep logs with timestamps, sensor values, and command results. A small pilot installation can reveal timing conflicts before they affect an entire building.

Choose a Programming Method for Scenes, Sensors, and Scheduling

5 Best Ways to Program Smart LED Lighting Controllers?

Choose a programming method that matches real room behavior. Scene-based programming stores precise levels for work, dining, cleaning, and rest. It is fast for wall buttons, but scenes can become outdated after furniture changes. Rule-based automation uses conditions such as occupancy, daylight, and temperature. Sensor logic works well in corridors and washrooms, although false triggers remain frustrating. A five-minute vacancy delay may save energy without leaving users in darkness.

Scheduling is the third method. Set warmer light at 7 p.m., lower brightness after midnight, and disable unnecessary exterior lighting during daylight. The International Energy Agency reports that lighting represents about 15% of global electricity consumption, so small schedules can matter across many rooms. Calendar-based schedules are useful for offices, but they should include holiday exceptions. I have seen perfectly timed systems fail because nobody updated the calendar.

For larger installations, use local scripts or an open application programming interface. Local control keeps scenes responsive during network outages, while APIs connect lighting with access, HVAC, or safety sensors. The U.S. Department of Energy reports that advanced lighting controls can reduce lighting energy use by roughly 20% to 60%, depending on the building and strategy. Start with conservative brightness limits, log sensor events, and test one zone for a week. Data often exposes uncomfortable assumptions. A quiet room is not always an empty room.

Build Color, Brightness, and Automation Logic with Modular Code

A smart LED controller becomes easier to maintain when color, brightness, and automation logic live in separate modules. I usually define a color module with RGB or HSV values. A brightness module handles limits and fades. Automation responds to schedules and sensor events. This separation makes testing faster and reduces accidental interactions. For example, an evening scene can request 30 percent brightness without knowing how colors are calculated. Use clear data structures, such as a scene object containing hue, saturation, brightness, and transition time. Keep hardware output code at the edge of the system. That choice helps the same logic run on different controllers. In field testing, I log every command with a timestamp and source. Logs expose timing errors that visual checks miss. Good practice.

Automation needs predictable priority rules. A manual command might override a schedule for ten minutes, while a safety limit always remains active. Use nonblocking timers instead of long delays, especially when sensors must be read continuously. Debounce noisy inputs, and validate network or sensor values before applying changes. I also add gradual transitions rather than jumping from dark to full output. It feels better, and it reduces sudden power demand. Still, modular code is not automatically perfect. I once separated routines too aggressively, creating needless files and slower debugging. A small controller benefits from simple interfaces and meaningful names. Test each module with simulated events before connecting real lights. Then test failure cases, including missing data, repeated triggers, and interrupted power. Document assumptions.

Connect the Controller to Home Networks, Apps, or Central Systems

Smart LED controllers become useful when they join the systems people already use. Five practical methods stand out: Wi-Fi, Ethernet, low-power mesh networks, mobile apps, and central building platforms. Wi-Fi suits apartments and small offices. Ethernet offers steadier control for commercial spaces. Mesh networks can cover rooms where signals weaken. Apps provide scenes, schedules, and remote adjustments. Central systems coordinate lighting with occupancy, temperature, and security data.

The U.S. Department of Energy reports that LED products use at least 75% less energy than traditional incandescent lighting. That saving grows when controllers reduce empty-room operation. Connect occupancy sensors first. Then create simple rules, such as turning corridor lights down after ten minutes. Use open communication protocols where possible. They improve interoperability and reduce replacement risks. However, connectivity is not automatically reliability. A wireless controller may fail during a network outage. Local schedules and manual wall controls remain important.

Tips: Separate lighting traffic from guest devices when the network allows it. Use strong passwords and update controller firmware regularly. The National Institute of Standards and Technology recommends secure device identity, protected communications, and timely patching for connected products. Test every scene at the switch, app, and central-system levels. Keep a printed fallback plan. It feels old-fashioned, but technicians may need it. I have seen installations become unnecessarily complex because every sensor controlled every lamp. Start with fewer rules, measure energy use, and revise the design after real occupants expose its weak points.

Test, Secure, and Maintain Smart LED Lighting Programs

5 Best Ways to Program Smart LED Lighting Controllers

Test, Secure, and Maintain Smart LED Lighting Programs

Smart LED control starts with clear scenes, not complicated code. Set practical states for occupancy, daylight, emergencies, and manual overrides. Keep brightness changes gradual, so a hallway does not suddenly flash at midnight. The International Energy Agency reports that lighting uses about 15% of global electricity. Small programming errors can therefore create measurable waste. Test each scene with empty rooms, blocked sensors, and unstable network connections.

Secure the controller before connecting it to other systems. Use unique credentials, encrypted communication, restricted permissions, and separate network segments. NIST Cybersecurity Framework 2.0 emphasizes identifying assets, protecting access, detecting events, responding quickly, and recovering reliably. Record failed logins and unexpected commands. Do not leave default passwords active. It sounds obvious, yet maintenance teams still miss this step.

Maintain the program like physical equipment. Review firmware, back up configurations, and inspect logs on a fixed schedule. Track energy use before and after changes; unexplained increases often reveal faulty sensors or poorly timed scenes. Keep a simple change record with the date, editor, and reason. I have found that undocumented adjustments cause more confusion than difficult code. A perfect schedule is a myth. Test seasonal settings, dimming limits, and power recovery after outages. The process is not flawless, but regular review makes failures visible earlier.

5 Best Ways to Program Smart LED Lighting Controllers? - Test, Secure, and Maintain Smart LED Lighting Programs

A practical comparison of programming methods, measurable engineering targets, security controls, and maintenance actions for connected LED lighting systems.

Programming Method Primary Purpose Recommended Implementation Useful Test Metrics Security and Safety Controls Maintenance Schedule
1. Use a Modular State-Machine Program Create predictable lighting scenes, schedules, occupancy responses, and fault states.
  • Separate input handling, decision logic, dimming control, and fault handling into independent modules.
  • Define explicit states such as OffOccupiedScheduledFault.
  • Use gradual brightness transitions instead of abrupt output changes to reduce visual discomfort and electrical stress.
  • Store a safe default scene locally so lights remain controllable if the network is unavailable.
  • Verify every state transition with positive and negative test cases.
  • Target a documented response time of less than 1 second for local sensor events where the application requires immediate control.
  • Confirm that power recovery returns the controller to a defined safe state.
  • Reject undefined commands and invalid parameter values.
  • Apply upper and lower brightness limits to prevent unsafe output levels.
  • Use a watchdog timer and fail-safe output behavior for software lockups.
  • Review state diagrams after every feature change.
  • Run regression tests before firmware deployment.
  • Check event logs monthly for repeated transition failures.
2. Program with Standardized Communication Profiles Improve interoperability between controllers, sensors, gateways, and luminaires.
  • Use documented application profiles and data types for on/off, dimming, color temperature, occupancy, and energy values.
  • Define network addressing, device discovery, command acknowledgment, and timeout behavior before coding.
  • Keep application logic independent from the physical communication transport when possible.
  • Use versioned configuration files so device settings can be reproduced.
  • Test discovery, pairing, command delivery, duplicate messages, delayed messages, and lost messages.
  • Measure command success rate during normal and congested network conditions.
  • Confirm that a controller handles at least three consecutive communication timeouts without entering an undefined state.
  • Disable unused services and unused communication endpoints.
  • Validate message length, data type, range, and source authorization.
  • Use encrypted and authenticated transport whenever the communication profile supports it.
  • Maintain a current device and protocol inventory.
  • Review interoperability after firmware or gateway changes.
  • Record configuration changes with date, operator, and rollback version.
3. Add Automated Hardware-in-the-Loop Testing Detect software defects that only appear with real sensors, drivers, loads, or power conditions.
  • Connect the controller to representative LED drivers, occupancy sensors, daylight sensors, switches, and power-monitoring equipment.
  • Automate test sequences for dimming curves, scene recall, sensor failure, brownouts, restarts, and network loss.
  • Use simulated sensor inputs to reproduce repeatable environmental conditions.
  • Store test logs, firmware version, configuration, and measured output for every run.
  • Measure minimum and maximum output, transition time, sensor-to-light latency, restart time, and communication error rate.
  • Verify that dimming reaches the programmed level without persistent flicker or oscillation.
  • Repeat power-cycle tests and confirm consistent recovery behavior.
  • Use isolated test equipment and current-limited supplies during development.
  • Prevent test commands from reaching production devices through network segmentation.
  • Protect test credentials and remove temporary debugging access before release.
  • Run automated tests on every release candidate.
  • Repeat critical tests after changes to timing, drivers, or communication code.
  • Calibrate measurement equipment according to its documented calibration interval.
4. Build Security into the Firmware Lifecycle Protect lighting controllers from unauthorized control, malicious firmware, and exposed credentials.
  • Use unique device credentials instead of shared default passwords.
  • Implement signed firmware updates and verify the signature before installation.
  • Separate administrative functions from ordinary lighting commands.
  • Apply least-privilege access, secure logging, and controlled remote-management procedures.
  • Test authentication failures, expired credentials, unauthorized commands, replayed messages, and interrupted updates.
  • Confirm that failed firmware verification leaves the previously working image intact.
  • Scan released firmware and dependencies for known vulnerabilities before deployment.
  • Use encrypted transport such as TLS where supported.
  • Protect private keys in a secure development and deployment process.
  • Disable debug ports or restrict them with physical and logical access controls.
  • Apply network segmentation between lighting controls and general-purpose systems.
  • Review security advisories and dependencies at least quarterly.
  • Rotate credentials according to the site security policy.
  • Retire unsupported firmware versions through a documented upgrade plan.
5. Use Telemetry, Diagnostics, and Preventive Maintenance Keep programs reliable, energy-aware, and easy to troubleshoot after deployment.
  • Record controller uptime, restart count, communication quality, sensor status, temperature, load level, and energy data when available.
  • Use thresholds for abnormal resets, overheating, repeated communication failures, and unexpected power consumption.
  • Provide a local manual override for commissioning and emergency operation.
  • Keep backups of firmware, schedules, scenes, calibration values, and network configuration.
  • Track uptime, mean time between failures, alarm frequency, response latency, and energy use.
  • Compare measured light levels with the design requirement during commissioning and periodic inspections.
  • Verify alarm delivery and recovery after simulated sensor or network faults.
  • Minimize collected data and avoid storing unnecessary personally identifiable information.
  • Restrict diagnostic dashboards by role and protect exported logs.
  • Synchronize timestamps securely to support reliable audit trails.
  • Review alarms weekly for actively managed sites.
  • Inspect sensors, wiring, thermal conditions, and controller enclosures at least annually or according to site requirements.
  • Back up configurations before maintenance and verify restoration afterward.
  • Recommission scenes and sensor thresholds after major space, fixture, or control changes.
Engineering targets in this table are practical recommended benchmarks rather than universal legal limits. Final programming, testing, electrical protection, cybersecurity, and maintenance procedures should follow the applicable local electrical, building, safety, accessibility, and data-protection requirements.

FAQS

What hardware details should be recorded before programming a smart LED controller?

Record input voltage, output current, channel count, and heat tolerance. Use a multimeter during bench testing. Test at full brightness for thirty minutes. Check ventilation and terminal access.

How can overheating risks be identified?

Run the controller at maximum brightness inside its enclosure. Inspect it after thirty minutes. Add ventilation if heat rises excessively. Leave service space around terminals.

Which inputs can control smart LED lighting?

Common inputs include occupancy sensors, light sensors, push buttons, and analog dimming signals. Record each voltage range and normal reading. Do not guess.

How should mechanical buttons be configured?

Use debounce timing between 30 and 80 milliseconds. This reduces repeated triggers from one press. Test several switches. Some buttons behave differently.

How should light sensors be calibrated?

Calibrate them beside a window and under artificial lighting. Record readings in both conditions. Bright afternoon light may cause unexpected dimming. I learned that assumption the hard way.

Which programming method suits different lighting needs?

Scene programming suits work, dining, cleaning, and rest settings. Rules can respond to occupancy, daylight, or temperature. Scheduling can lower brightness after midnight. Use holiday exceptions.

How should manual commands and automated rules interact?

Give manual commands temporary priority, such as ten minutes. Keep safety limits active at all times. Use gradual fades instead of sudden full brightness. Simple rules are easier to trust.

What should happen when communication stops?

Define message formats, device addresses, timeout rules, and recovery behavior. Test network loss deliberately. Lights should enter a safe state. They should not remain fully powered.

Why are modular programs useful for smart lighting?

Separate color, brightness, and automation modules. A scene can request 30 percent brightness without calculating color. Keep hardware output at the system edge. Avoid creating needless files.

What tests should be completed before wider installation?

Test one zone for a week. Log timestamps, sensor values, commands, and failures. Simulate missing data and repeated triggers. A quiet room is not always empty.

Conclusion

Programming a smart LED lighting controller begins with understanding its hardware, available inputs, power requirements, and communication protocols. The next step is choosing a suitable programming method for managing lighting scenes, motion or environmental sensors, time-based schedules, and responsive automation. Well-structured, modular code can then control brightness, color temperature, dimming transitions, and operating modes without making the system difficult to expand or troubleshoot. A practical design should also answer the question, “How to program a smart LED street lighting controller?” by combining local control logic with reliable scheduling and sensor-based adjustments.

After the core functions are built, the controller can be connected to a home network, mobile application, or centralized management system through an appropriate communication interface. Thorough testing should verify timing, sensor responses, brightness changes, connectivity, and recovery from power or network interruptions. Finally, secure access controls, protected communications, clear documentation, firmware maintenance, and regular performance checks help keep the lighting system efficient, dependable, and adaptable over time.

Liam

Liam

Liam is a dedicated marketing professional with a profound expertise in the industry, where he excels at highlighting the unique advantages of our core products. With a keen understanding of market trends and consumer needs, Liam frequently updates our company’s professional blog, providing......